Latest Posts

Testing Garlic Roasters

The past few weeks I’ve been experimenting with lids. One of my very first lidded projects was to make these garlic roasters! I’d never roasted garlic before but my boyfriend had, and he suggested I try it out. They turned out really beautiful! My research about them revealed that they’re usually done in unglazed terra cotta, and soaked briefly in water before being used for roasting. The extra water that soaks into the terra cotta is supposed to help them roast the garlic. Since I’ve never used a garlic roaster before, and don’t have access to terra cotta, I thought I’d try a couple different glaze patterns and try them all to see which one works best.

IMG_2436

As you can see, I have one roaster that is entirely unglazed, one that is fully glazed, and one that is left unglazed on the inside only. Unfortunately the vent hole in the partially glazed roaster was blocked with glaze during the firing so I wasn’t able to test that one out today. Once it gets warm enough to work outside I’ll dremel it back open and try it out! But for today a test between the two opposites: glazed and unglazed!!

IMG_2439

It worked out nicely that my two available garlic cloves were different sizes, they matched perfectly with my large and small roasters! I tried to keep everything as similar as possible so I could make it a fair test. I started by chopping off 1/4inch from each bunch of garlic.

IMG_2441

I added olive oil and salt to each head of garlic, and soaked the lid of the unglazed roaster briefly before popping both into a COLD oven. That part is very important!! Ceramic bakeware should always be started in a cold oven to avoid cracking. To adjust for the time preheating, I just start the clock after preheating has finished. Even so, it took longer than I expected for these to finish cooking; the recipe I used suggested about 35 minutes, and from start to finish it was closer to almost an hour! I checked them after the 35 minutes and they looked like this:

IMG_2447

Contrary to what I expected, it seems that the fully glazed roaster cooked faster/better than the unglazed! If you look closely you can see that on the blue plate, the garlic is golden brown and mostly soft, whereas on the unglazed plate the garlic is still mostly solid and hardly browned at all. I put both back in to keep my test consistent and waited another 20 minutes before taking them back out of the oven.

IMG_2450

Oh yes. Thats what it should look like! Nice and brown, soft, and extra juicy! The garlic in the unglazed roaster looked very similar to this one after the extra time, however the glazed roaster worked faster overall, so I think glazed is the winner here! I do however like the shape of the unglazed better; its plate has a lip that makes it easier to pick up out of the oven, and I think in the future I’ll make all my roasters either with that lip or with handles of some type. IMG_2452

The only thing left to do is the taste test! I used regular wheat thins and added nothing to the garlic, only smashed it up to make it more spreadable. There was no noticeable difference in the flavor that came from the two roasters; both tasted AMAZING, although I definitely had some pretty intense garlic breath afterwards! I’ll definitely be making some more of these in the future!

WIP of the Week: Fish Paintings!

IT IS STILL SNOWING. This winter needs to end already. Since I was stuck inside for about the millionth time this winter, I decided to do some painting today! During college I did a couple paintings based on black moor goldfish, and they are still some of my favorite works! They’re different from my usual style, but something about them just really appeals to me. My first and most favorite is the one below, in rainbow! I have in hanging in my front entryway.

IMG_2444

I’ve also done one with ghostly white fish, which is much smaller and in my bathroom. I’ve been asked multiple times to sell the larger one but I just can’t part with it! So today, I’m working on a new version.

IMG_2446

A diptych! I think this one will turn out really really great. This is just the underpainting, I haven’t decided yet what color I want these fish to be- it could be another rainbow, or possibly black fish, or even a few black and a few orange! I also have a silver metallic that could be really cool (or really not cool). As soon as I decide what color I want I can finish it! Any suggestions?

Spring Goals

There is currently at least 14 inches of snow on the table outside my window. Its like winter just totally kills my productivity! All I want to do is stay inside where its warm, and it really limits the activities you can do in general. In addition, spring is the start of the sale season for my pottery, and this will be the first year that I’m ready to sell my work all summer long! Usually this time right before spring would be the perfect time to really produce a lot of work- but the snow has stopped me from getting to, or staying at, the studio multiple times this month! I’ve been spending my days off thinking about what I’d like to accomplish in this first full year of my career, but before I go over my goals for the future, I wanted to recount my progress from last year.

Last year I started working at the studio in April, and had my very first sales experience in early June at the studio Seconds Sale. Seconds are pieces that aren’t perfect enough to sell at full price, just like how bruised apples are often discounted or sold in bulk. For potters, it can look sloppy to include seconds in normal displays, even if they’re separated in a “Sale” section. Imperfect pieces most often end up donated, smashed, or as in this case, sold cheaply in large quantities with other potters’ seconds! Since I’d only been at the studio part time for a month and a half, and hadn’t made anything in over a year before that, I just put everything that I had in the seconds sale! I set my prices a little high just to see how it would go, and while I could’ve sold more if my prices were lower, I still made over 100$ on each of the two days!

By the end of August, I had built up a reasonable inventory of pieces I considered good enough to sell at full price. I contacted a local farmers market and was able to set up a booth one saturday per month for the next couple months. My first day at the farmers market was amazing! I made over 300$ in less than 6 hours. Unfortunately my second and third experiences were less profitable, with one on a very overcast, windy day, and the other during labor day weekend. This was a perfect way to learn that holiday sales can go either way, mostly based on location- if I had been in town, where people spend their days off, I would’ve sold way more than I did at a small-town farmers market, where people go to run their errands. By the middle of October its getting pretty cold here and my window of opportunity to sell outdoors is almost completely gone.

My next sale was an amazing opportunity to sell my pottery with 4 other artists at my studio at the 2014 Maryland Christmas Show. It went fantastically! It was my first view of what its really like to rent a booth at an event and work a sale for 6 days over 2 weekends. Luckily the event is right in Frederick so I could go home between working the booth- I saw tons of people from all over the country, sleeping in their cars or renting rooms for the whole 2 weeks! It was pretty exhausting even living so close to work a show for that long. I made a good bit of money though, and I sold nearly all of my inventory! I went in with 6 boxes of pottery and came back with less than one full box.

Since the Christmas Show, I’ve been working in the studio making more pots, practicing new techniques, and teaching classes. I teach a children’s class of my own, and now I’m also helping out with one of the very full beginner adult classes. Teaching is honestly making me learn so much more than I expected for it to! I really enjoy teaching and it is a great source of extra income. In addition to my usual studio duties I’ve also started loading and running the kilns almost every day. It can be exhausting but again, it is such an amazing learning experience! I helped load and start kilns during college but being the only person in charge of doing all the steps, without someone checking your work, is a whole new responsibility. I now feel capable of running my own kilns (when I have them one day!) without worrying too much about complications from my inexperience.

Finally!! On to my goals for the upcoming season.

My most important order of business is researching and applying to sales opportunities. I’m currently applying to the Bethany Beach Boardwalk Arts Festival. This is a juried show- meaning I have to send in a sample of my work, and then IF I’m chosen, I can rent a booth space and sell my work. This festival isn’t until September, which is good, since I want to take some of my best work there if I’m accepted. I would like to make it to at least 3 big sales like this between May and October, with scattered smaller events throughout the summer. The Bethany Festival is perfect for me this year because while it is far away- I’d definitely have to pack up my work and spend the night at the location- It is also in a very familiar area to me, and I would even have a place I could stay for free just minutes away from the festival. I really hope it works out!! I also want to continue teaching my children’s class, and maybe even start teaching my own adult class!

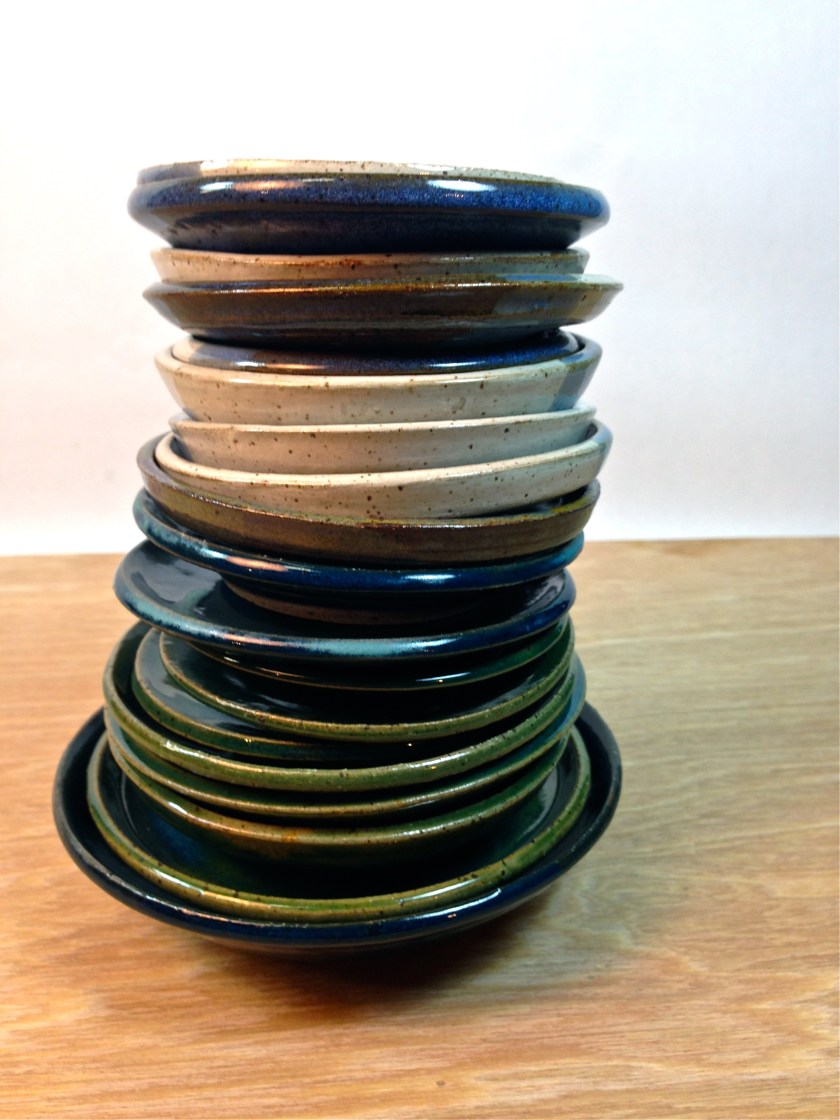
I was given 2 bags of clay for my birthday this year, one of porcelain and one of black clay. I’m nervous to start using them because I worry that I’ll love them so much that I won’t want to stop using them! So, I’ve decided to learn how to recycle my own clay and try to make it more worth my while to buy clay. I have access to all of the leftover porcelain from other students in the studio- its very wet, and a mixture of a few different types, but I think it could be recycled into usable clay. Id like to start working in porcelain as much as I can, since the clay I’m currently using, while not BAD, definitely isn’t the most beautiful clay body. Its good for practicing and for making more rustic- style pieces, but it would be nice to have something sleek and beautiful like porcelain to make some of my more decorative pieces with.

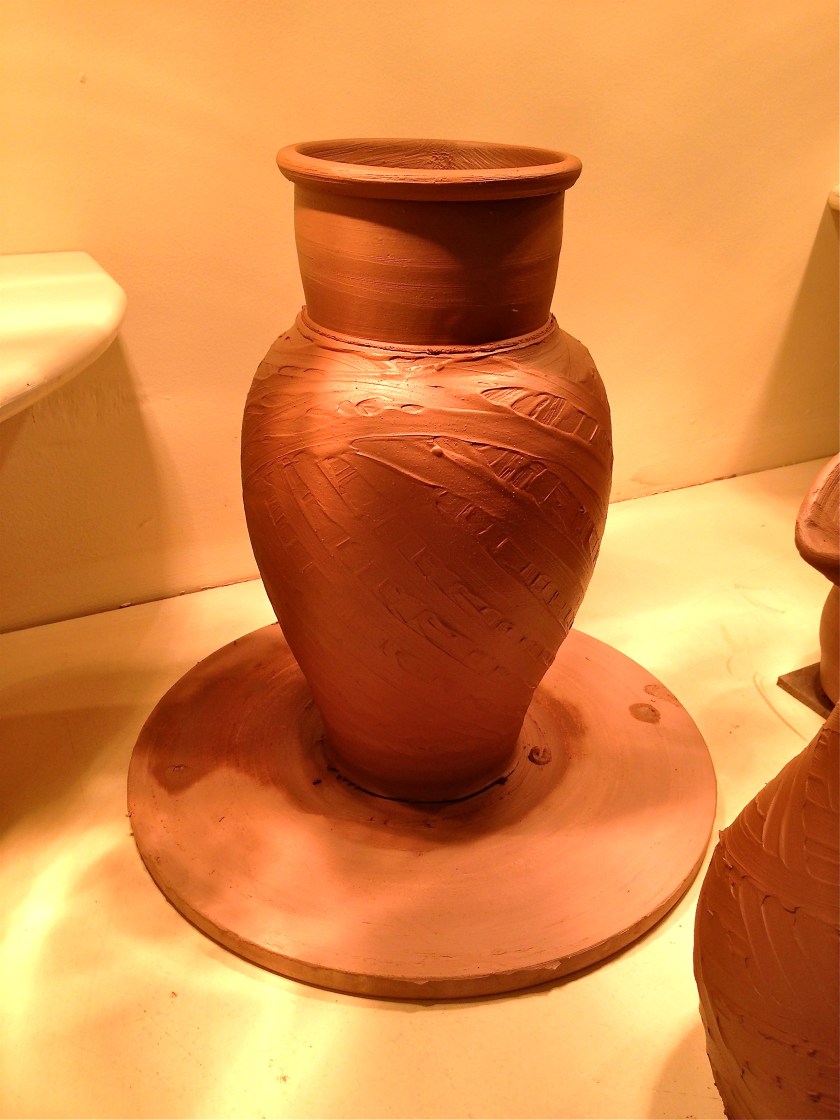
As for techniques I’d like to improve, it is mostly based around making matched sets. I’d like to be able to make sets with ease, from cups and bakers to lids and mixing bowls. This involves measuring, weighing, and most importantly practicing. I know that I can get there and have already made a ton of progress in the past few weeks. I also want to make some really big pieces- showpieces to take with me to events as an attention grabber! I think doing a lamp would be really fun and right up my alley.

Now heres something a little different- I’d like to get back into painting and drawing. For a while I’ve been wanting to do a charcoal series of locations around Frederick. I’ve done one in the past that turned out pretty good, and I think making many could be a really lucrative idea! Not only would the locals love it, the exploding tourist industry in Frederick would go crazy over it too. I really do love drawing and I’ve missed it since I started my pottery. To get this started I need to take pictures around Frederick, which I will start to do as soon as it gets a little warmer. Once I have my drawings I’ll try to get them in the galleries or shops downtown, or possibly even sell them in the Pottery Shop. If I make it into any of the galleries I might even start doing more paintings!

So thats my general plan for spring! Every year since graduating college has taken me miles farther than I expected to be, and that was without coming up with a plan of action beforehand!    What are your plans for this year?

Whoops…

This week I had a tragedy. I had 2 full boxes (nearly 30 pieces) from the past couple weeks glazed, finished, priced, and ready to go into the shop. I parked in the parking lot of the shop and pulled the bigger box out of the car….and the handle of the cardboard box ripped off, crashing the whole thing to the ground. I saved only 2 pieces from this entire box. Even though it was heartbreaking, this is a good lesson to learn- theres absolutely nothing I can do about it now other than never use an unstable box ever again! My other box of work carried in a plastic bin survived just fine and is ready to be sold in the pottery shop. I’ll just have to remake the pieces I lost, and hopefully they’ll be even better the second time. Life goes on!

Early Spring Cleaning

It’s totally almost spring. The days are getting a little bit longer and its almost not cold out. Right?? Either way I’m going to pretend its spring and start doing my spring cleaning! Doesn’t it just feel so much lighter in the house when things are clean and tidy? The first area on my list is the kitchen, so today I started by wiping down all the counter space, moving everything including the toaster oven so I could clean everywhere. And then it was time for…the dreaded gadget drawer.

IMG_2404

This drawer holds all the extra kitchen gadget stuff that you use occasionally but not enough to leave them out. Over time more things get thrown in there, and as things are used they just get tossed back in… until THIS happens. I know its a disaster. But I’m ready to face my mistakes and organize it!

IMG_2408

Six minutes later and we have this! It isn’t perfect, but in a gadget junk drawer, especially in this tiny kitchen, being able to see and even reach everything is pretty excellent. And I only took ONE thing out! An electric carving knife that I never have and never will use to carve literally anything I’ve cooked. Now foam batting on the other hand…that is something that I can use this thing for! As I’ve heard, an electric carving knife is the absolute best tool for cutting through foam.

IMG_2411 Things I’m planning to make out of foam include a foam bat for trimming pottery, and later this spring I’d like to make pillows and cushions for my floor seating area! Come on warm weather!!!

WIP of the week: Lids!

This week I started playing around with lids. I’ve made lids in the past, but they’re never quite the right size- in trying to make sure they’re not too big I almost always make them too small! So I’m going to be spending a lot of time this month practicing lids.

IMG_2384

These vessels aren’t for any specific purpose other than to make a lidded jar, so some of them have kind of weird shapes. I like to test out new shapes and ideas whenever I’m not making something for a specific purpose because, who knows, it could become a favorite! I want to eventually be ready to make lidded casseroles, honey pots, and tea pots.

IMG_2387

These two pots actually switched lids! The bigger lid ended up fitting on the smaller piece and the smaller lid is too small for the one its on. Once they’re fired I may switch them back to their original pairs but in this picture, the piece on the right has a perfectly fitting lid and that was pretty cool!

IMG_2385
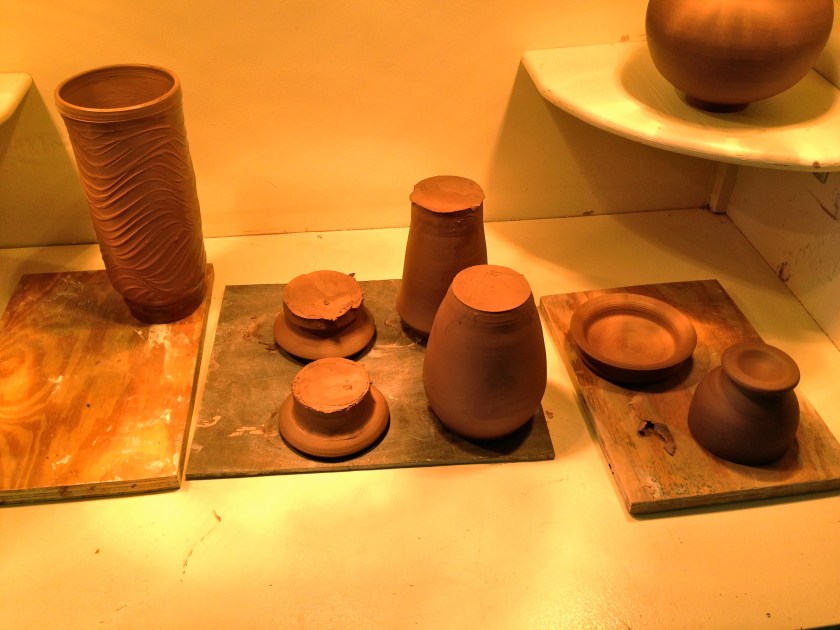
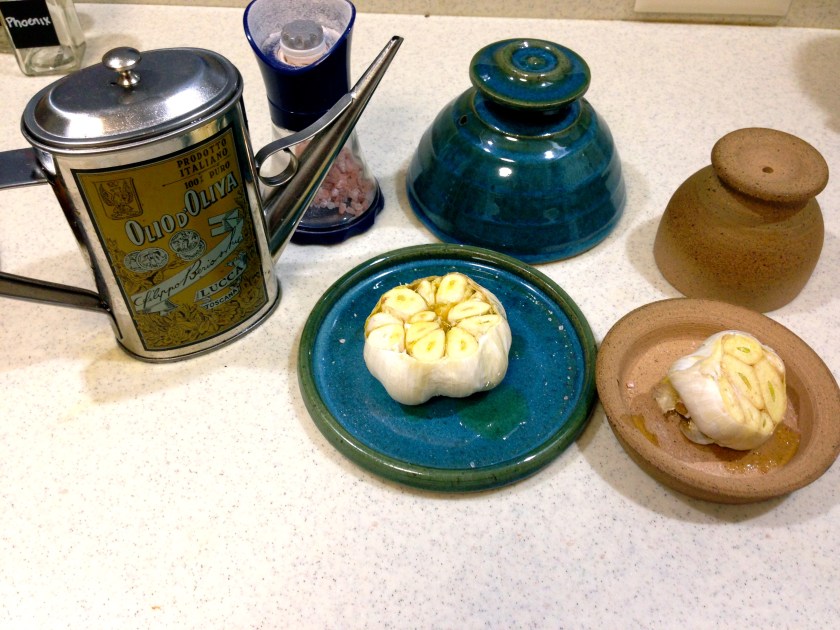
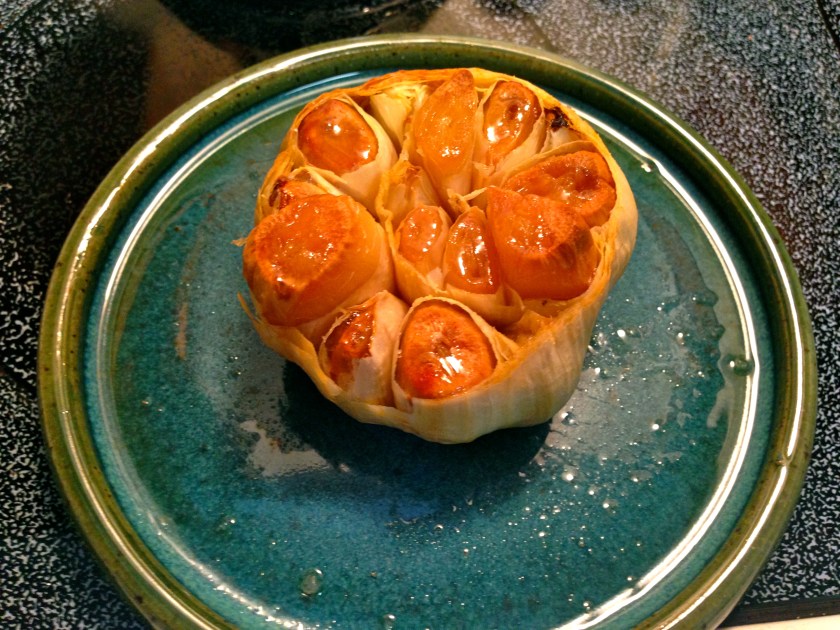
I also made a few garlic roasters! I’ve never used a garlic roaster before but apparently they make garlic creamy and spreadable, and were another perfect excuse to throw some lids. I’ll be trying these out before I sell them to make sure they work and if I like the results, I may have to keep one for myself.

IMG_2397

The next day I tried some larger pieces with lids. These two are cookie jar sized and again, traded lids at the last minute. This time the piece on the left has the perfectly fitting lid, which I have since added an awesome thrown handle to! All of these pieces are smooth and will be showcasing a new glaze I tried out this week.

IMG_2398

Last but not least I made a little set of brie bakers. These sell like crazy for some reason! I wanted to practice throwing “identical” pieces and I think with these it worked pretty well. They’re nice and big and I really like the shape. I’ll also be trying these out before I sell them (to make sure they don’t crack in the oven) and when I do I’ll post the recipe I tried out!

My DIY Sewing Basket

I’ve been wanting a sewing machine for a few years, and this year for Christmas, I got one! Along with the machine I received a box full of tons of colors of thread, bobbins, and a few other sewing supplies and tools. I already had a small sewing basket with hand sewing tools and a couple threads, and unfortunately, not all of my supplies would fit into only one of the boxes! I tried to use both for a while but organization is so important if I’m going to be productive. So I went on the search for a new sewing basket!

IMG_2372

I love thrift shopping. You can always find either exactly what you need, or something that you can MAKE into exactly what you need. When I saw this box in my local thrift store selling for $1, I had to have it. It looked close to the size I wanted and I love that silk brocade!

IMG_2373

With boxes the inside is the deal breaker or maker. I opened it up to find even more beautiful fabric! Yay!! The only problem was a styrofoam insert covered in more cloth that looked like it might have held a vase at some point. I tried to lift it up in the store but it seemed glued down, which was worrying, as this could mean the bottom wasn’t lined, but I figured for one dollar I might as well give it a try. When I got it home I was able to gently rip it right out without a trace left on the box! And the bottom is not only lined, but padded. Perfect!

IMG_2374

I started by filling up the bottom of the box with all my different threads. I’d hoped they’d fit a little more cleanly but they do fit and thats what matters! I put my bobbin box down in the bottom too.

IMG_2379

I knew I needed a drop tray if I was going to keep anything organized at all, and obviously this box didn’t come with one, so I made one myself. I chopped up an old shoebox to get the cardboard I needed and then taped it together with packaging tape. I organized all my tools and decided what kind of dividers I wanted and then cut out my walls to the sizes I needed.

IMG_2380

It definitely isn’t the most beautiful divider tray, but it works perfectly! I might cover the inside with paper or something if the urge strikes me, but for now I’m happy with it! I love that the dividers are custom fit to the sizes I need, and I especially love that it only cost me $1 and a little bit of work to have a beautiful (at least on the outside!) and useful sewing basket!

IMG_2383

Did I mention how cool it is that my sewing basket is covered in fabric? Its the little things that make me happy! Now I just have to start my next sewing project!

Homemade All Purpose Cleaner

I’ve recently gotten into making my own cleaning and personal care products! I was concerned at first that because they only have a handful of very simple ingredients, and while they might be “better” for you, they might not actually work that great. I couldn’t have been more wrong about that! The few products that I’ve tried out so far have smelled great, worked amazingly, and you just feel so good about using them. Also, once you have the ingredients, you won’t have to buy them again for months, even years!

My first project was to make an all-purpose counter cleaner. Having clean kitchen counters makes the whole rest of the kitchen seem cleaner, and since you use your counters for food prep it’s one of the best places to start using less chemicals. After trying a few different methods, I’ve found that this recipe is my favorite. It really couldn’t be much easier than this!IMG_2367

Homemade Counter Cleaner

  • 2 Tablespoons distilled white vinegar
  • 1 Teaspoon borax
  • a few drops of scented castille soap, OR a few drops dish soap and a few drops essential oils (I used tea tree scented castille soap).
  • 1 cup very warm water
  • 1 32oz spray bottle

Heat water until hot, but not boiling. Using a funnel, add first the borax, and then the hot water to your spray bottle. Swirl until all of the borax is dissolved, and then add the vinegar and castille soap and swirl again to combine. Finish by topping off the spray bottle with water and replacing spray head. To use, simply spray on surfaces and wipe with a soft cloth, no rinsing required! Now get to cleaning!

WIP of the Week: New Glaze, New Plates

This week I’ve been trying out some new glazes and also doing some hand building! Right off the bat, this glaze has jumped to my top 2 favorite glaze combinations. Its so interesting and unique! I love the matte sage green that pools to a sandy color, and then how the dark purple stripe is extra shiny in contrast. Gorgeous!!

IMG_2340

As for the hand building, I usually prefer to spend my time throwing, but since I’ll be teaching hand building next month I figured I should get some practice in- and I’m actually loving it! These small plates are a perfect quick project for kids, and the process is easy enough that you could make tons of different shapes with the right press molds.

IMG_2187

In the past I’ve made small plates thrown off the hump, which are perfect to sell as candle plates, teabag/sauce holders, jewelry dishes, or whatever else you might want to use a small plate for! They also happen to make very nice test tiles for me since they’re quick and easy to make and a perfect “throw away” surface for testing glazes. If I test a glaze on one of these and its horrible, then all I’ve lost is a 2 second little plate, instead of something that I spent considerable time on. However if I test a glaze and its stunning, I have an affordable, fun little dish with tons of uses! I have the round plates currently available for sale on my Etsy. These new square plates are almost better as test tiles, because they’re even easier to make, and are nearly 100% uniform in size and thickness with no additional effort on my part. And they’re square! I currently have access to 3 different sizes of the mold that made these, 2×2, 2×4, and 4×4. I really like how these look and I think it could be really nice to make them in even bigger sizes… maybe a full size sushi platter? I’ll still make the round ones but this is a great new form to have in my inventory!

IMG_2189

WIPs of the Week

For anyone who doesn’t know, WIP stands for work in progress. I work in the studio at least 5 days a week, so, I have a lot of progress photos! I think its really helpful when you’re creating anything to keep a record of what you’ve been doing; you can take a step back and look at what you’ve tried, and what worked and didn’t work. And personally I just love to see close ups of interesting textures or glazes!

This week I’ve been trying out some textures with slip. I got some really interesting basket-weave and honey comb effects!

IMG_2333 IMG_2331 IMG_2330

Heres a vase and pitcher I was playing around with, freshly thrown and then after trimming and adding handles. I had another slightly smaller vase (you can see it in the first picture) but I dropped it right before I was going to trim it!! Ruining a piece is always sad but the larger one turned out so nicely that it makes up for it!

IMG_2324IMG_2335

I really like the combination of the soft organic texture of the slip with the harder looking handles and trimming on this vase. The pitchers handle is a little bit too big, but I haven’t done big handles in a while and was getting impatient. I haven’t decided if I’ll fire the pitcher yet or not, but I looove that vase!

I really enjoy texturing like this, its fun to do and the right glazes look so amazing over it! This is a pot with a looser texture and it was really difficult to capture just how lovely it is in a photograph. All of the crevices have a beautiful glassy blue color!

IMG_2322

Thats all for now! Thanks for reading!